Words to Live By BOM | Month 8

Written by: Jenni Wingenroth
Please note a pattern correction on page 15:
Month 8, Page 15, Block 13, Step 9
The step should read:
9. Place the remaining (4) units created in Step 6 onto your station so that the seam between Fabrics J and N is located on the left, and the seam between Fabrics J and I is located on the right. Place (4) 1 1⁄2” x 18 1⁄2” Fabric A strips below the units, and (4) 1 1⁄2” x 18 1⁄2” Fabric E strips above the units.
Please note, the diagram under step 10 is incorrect.
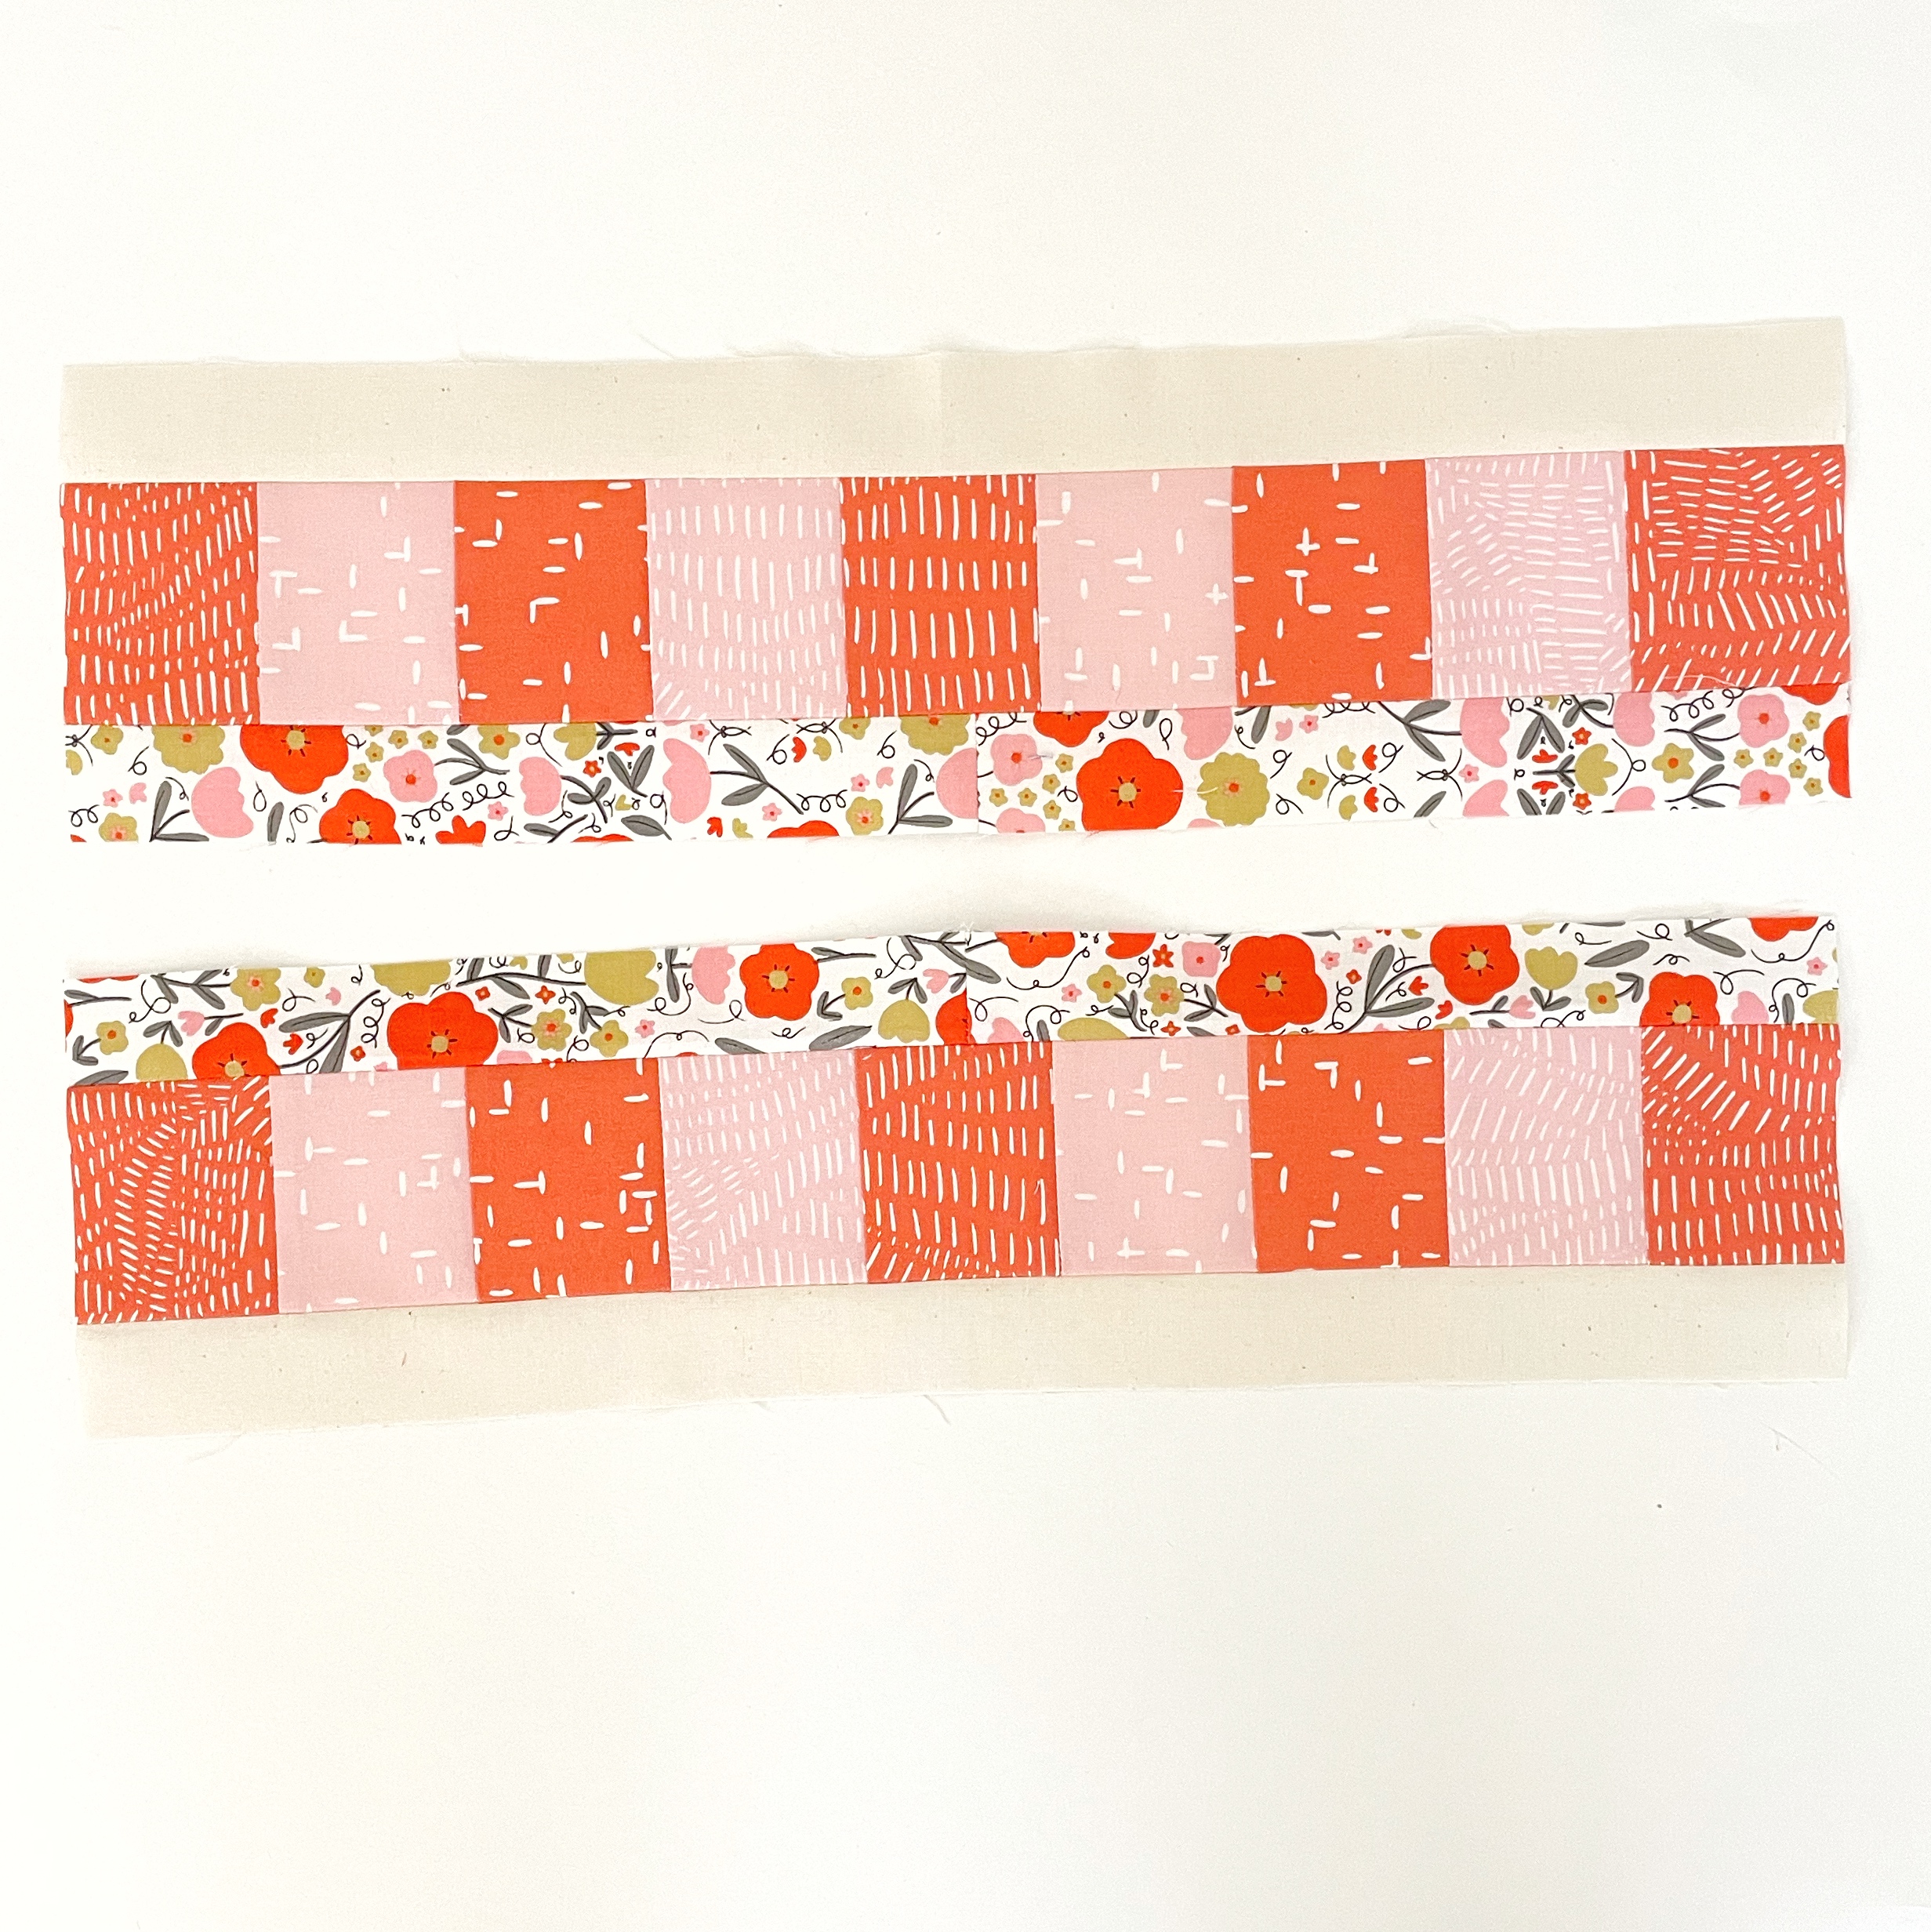
When finished with steps 7 through 10, you should have two sets of four (4) sashing units that mirror one another (as pictured below).
Hi friends, and welcome to Month 8 of the Words to Live By BOM! My name is Jenni Wingenroth of Nollie Bean and I’m excited to work on Months 8 and 9 right along with you!
Before we dive in, I’d like to take a quick moment to introduce myself. I’m a mom, runner, quilt pattern writer, and quilter who lives in the desert southwest. I love making colorful quilts inspired by our natural world, and I could not be more excited to finish this quilt together with you - this fabric collection is one of my all-time favorites!! :)
This month we’re sewing up a block centered around the charming sewing notions panel and making our colorful sashing.
 Once you’ve cut out your fabrics and trimmed your panel down to a 9 1/2” x 9 1/2” square, you’ll want to make sure you have your tools for making half square triangles handy. Do you mark your fabrics, use diagonal seam tape, or perhaps do both?
Let’s get started with all of those half square triangles. So, if you’re one who marks your fabric, start by marking a diagonal line on the wrong side of the fabric. I prefer to use a frixion pen and then marked a diagonal line on the wrong side of my Fabric Q squares. Then, following the HST Unit Guide on Page 2 of your pattern, make a total of 16 half square triangles (8 with Fabric G and 8 with Fabric I) and trim them all down to 3 1/2”.
Once your HSTs are trimmed, grab your trimmed panel 11 and layout your quilt block following the diagram for Block 12 on page 14 of your pattern. Then, sew everything together using a 1/4” and pressing in the direction of the arrows in the pattern. And just like that, Block 12 is complete!
 Now, let’s gather up all of our pieces to make the sashing (Block 13). We will sew eight sashing pieces in total.
Begin by lining up the 3” x 2 1/2” rectangles in the order shown in the pattern (J, N, O, I, J, N, O, I, J). If you have your rectangles in stacks of eight, it will make chain piecing your sashing faster!
Then, chain piece the rectangles to create eight identical sashing pieces that measure 3” x 18 1/2” unfinished and then press all of your seams to one side in the direction of the arrow in the pattern.
Before we continue, let’s just take a moment to admire these pink and coral colors - I love how bright and happy this sashing is! And it’s about to get even happier as we add a strip of bright and happy florals to the mix!!
So, let’s get to it. Following step 7, place four sashing units onto your workstation so that the seam between Fabrics J and N is located on the left. Then sew your background (Fabric A) strip to the top of your sashing and that bright and happy floral strip to the bottom of your sashing. Awww…isn’t it even happier now :)
NOTE: As we finish sewing our sashing, please note there is a pattern correction to step 9! Rather than placing your remaining four sashing pieces on your station so that the seam between Fabrics J and I is located on the left - you will place them on your station in the SAME ORDER as you did in step 7 with the seam between Fabrics J and N located on the left.
Making note of the pattern correction above, place your remaining four sashing units onto your workstation in the same direction, with the seam between Fabrics J and N located on the left. Now, sew that bright and happy floral to the top of your sashing and the remaining background (Fabric A) strip to the bottom.
You should now have two sets of four sashing units that mirror one another (as pictured below). Awesome! Block 13 is complete! We have one last block to create as we wrap up Month 8 — and it’s an easy one! From the fabrics you cut for Month 8, you should have four pieces remaining - two 5 1/2” squares of Fabric A and two 5 1/2” squares of Fabric E (that bright and happy floral I love so much!).
Grab that marking tool one last time and mark a diagonal line on the wrong side of your Fabric A squares. Follow the HST assembly guide on Page 2 and make four of the happiest half square triangles ever. Then, trim the units to measure 5” squares and give yourself a pat on the back! We are finished with Month 8 and so close to having our quilt tops complete!! I’m looking forward to joining you again for Month 9. It’s the final month of the BOM quilt. We’ll be making our last block, sewing up some large flying geese, and then putting it all together. I cannot wait to join you. Until then, happy sewing!!
Find us on Instagram @gingibermakes. Share your work with the hashtags #gingiberbom and #wordstolivebyquilt so that we can follow along with your progress!
Questions? Contact us at [email protected]

Stacie Bloomfield
Author
My name is Stacie Bloomfield! I am the owner and illustrator of Gingiber. I have been an illustrator for 11 years and have successfully sold my artwork across several categories such as art licensing, wholesale, direct to customer sales, direct downloads, books, teaching, and more. I cannot wait to teach you how to do the same!

FREE GUIDE!
We've gathered top secret tips from industry experts with their PERSONAL ADVICE for finding your creative voice and for growing your creative business. YOU DON'T WANT TO MISS THIS!
Recent Posts