Words to Live By BOM | Month 3

Written by: Natalie Crabtree
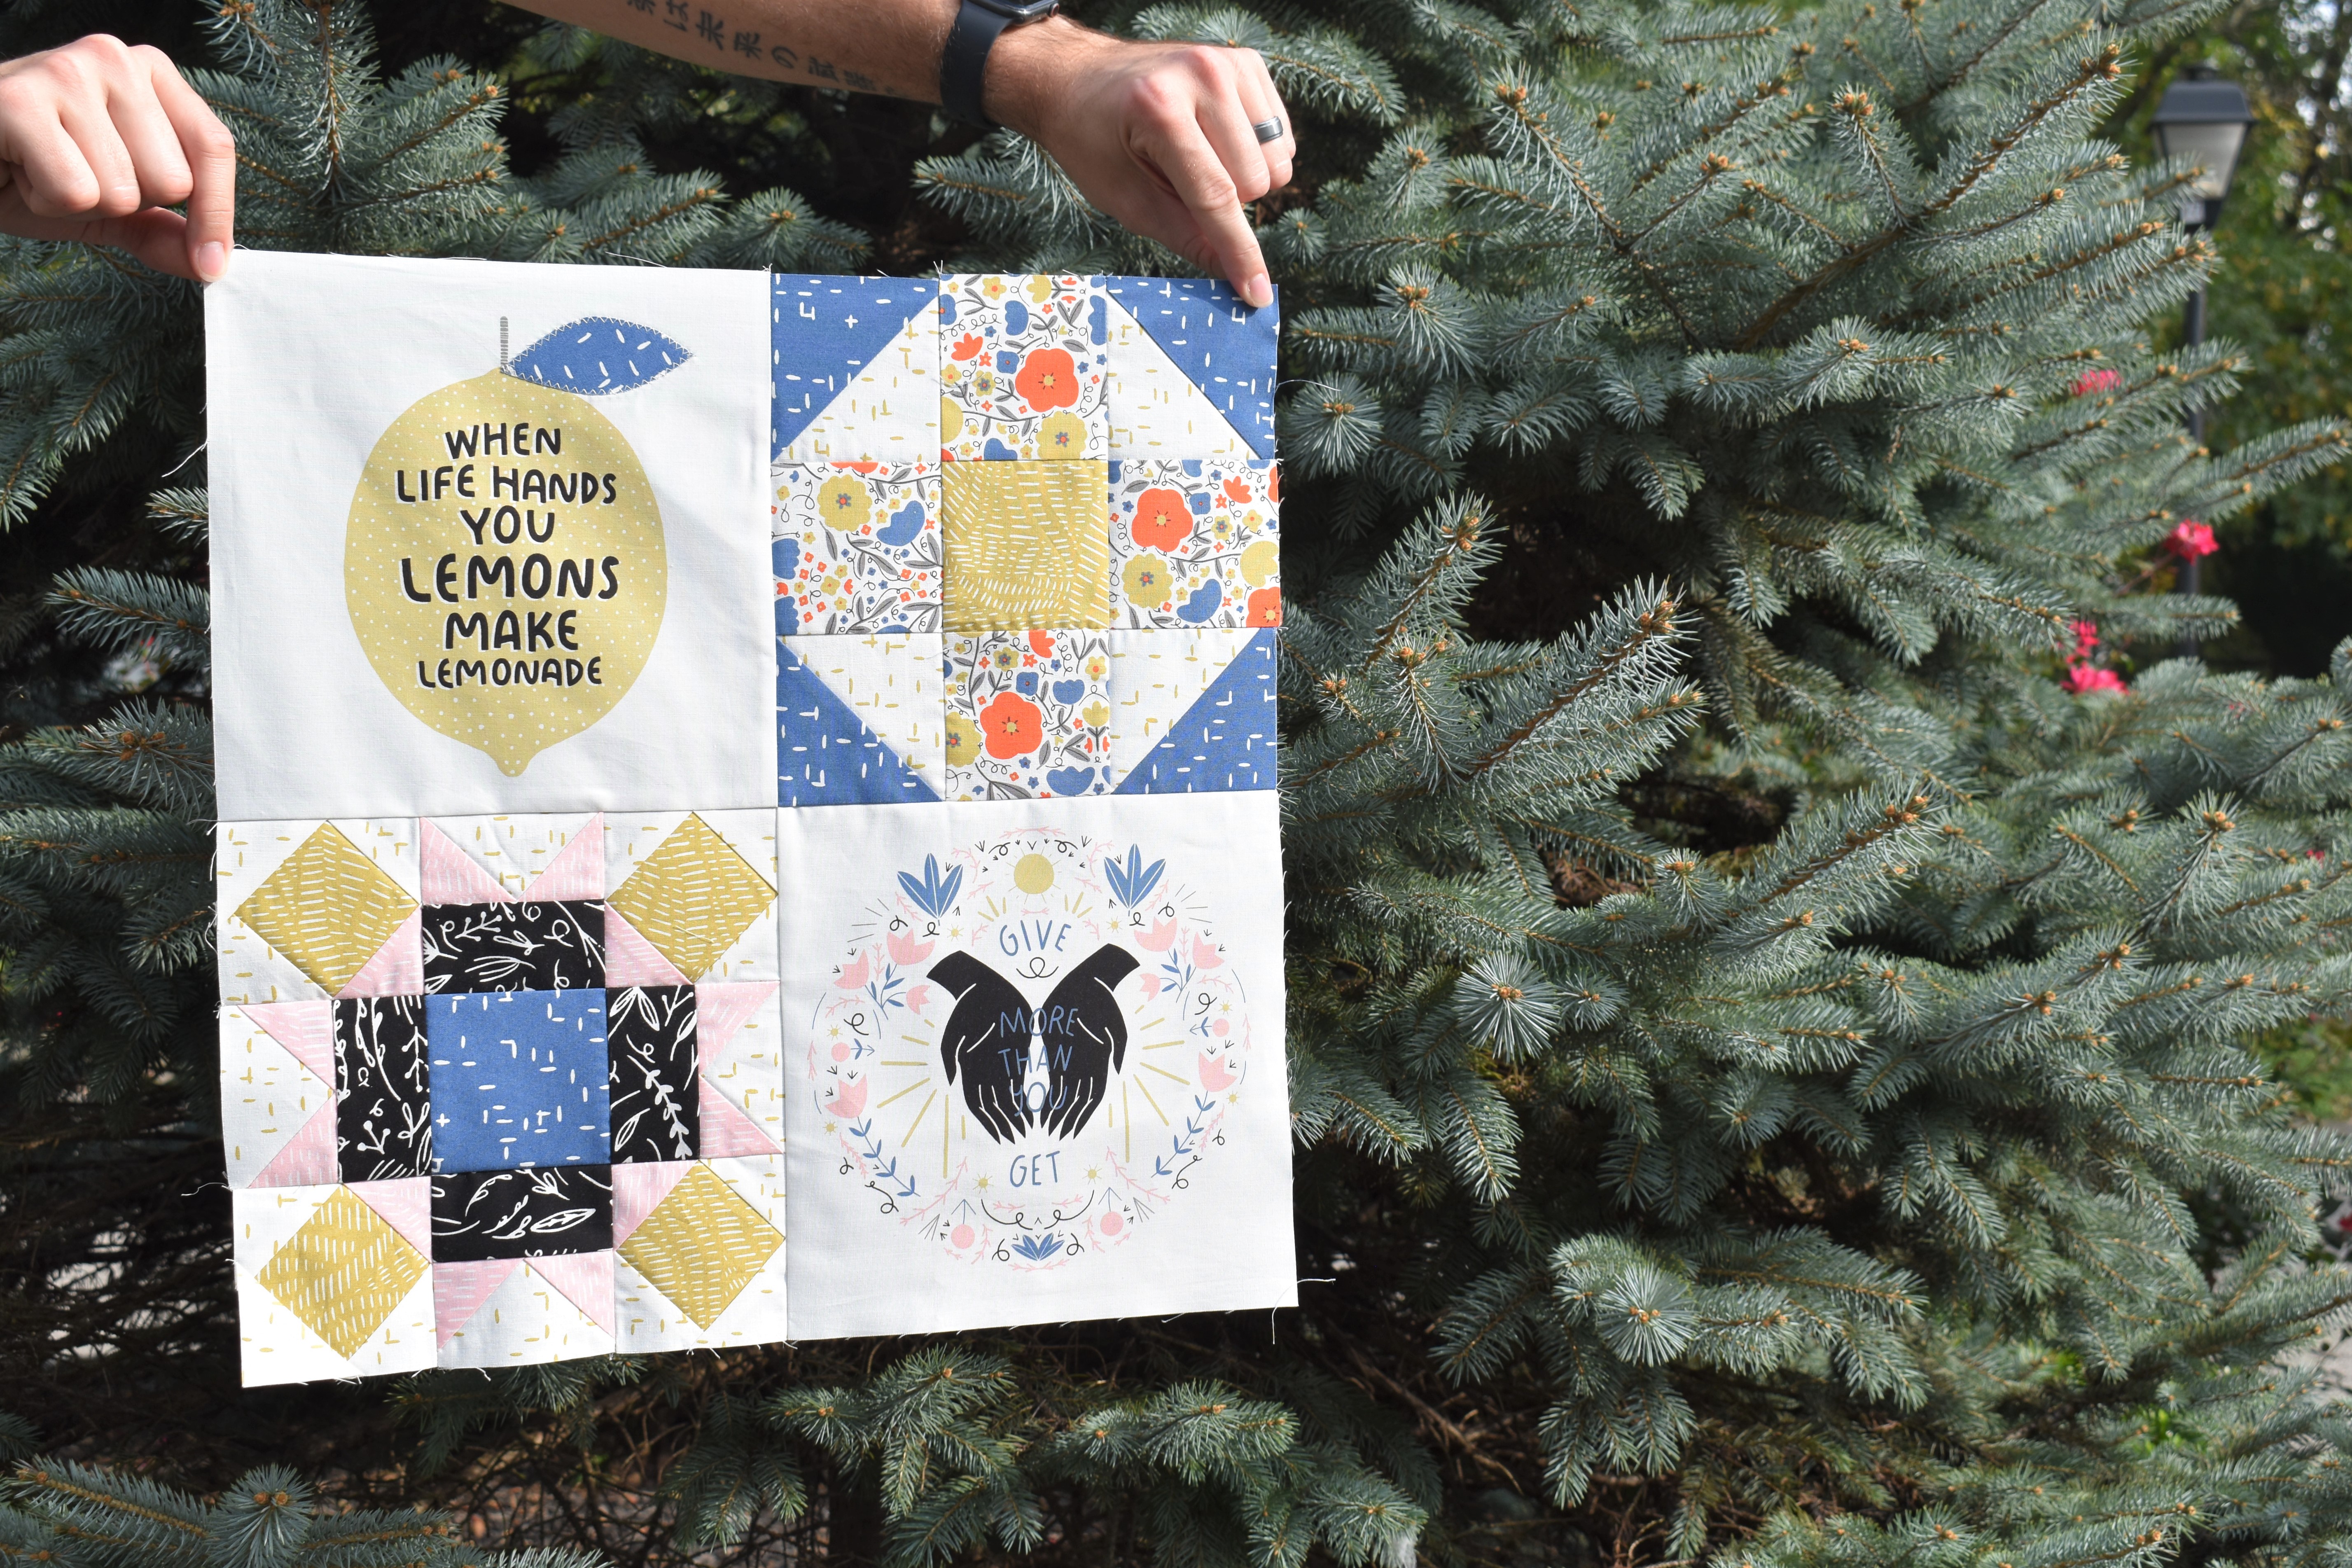
Hello quilters, and welcome to Month 3 of the Words to Live By BOM! Month 3 was so fun to create! I truly enjoyed the simplicity of it, and the message behind the panels. I have beautiful photos, helpful tips and even a fun addition to the Lemon panel for you this month!
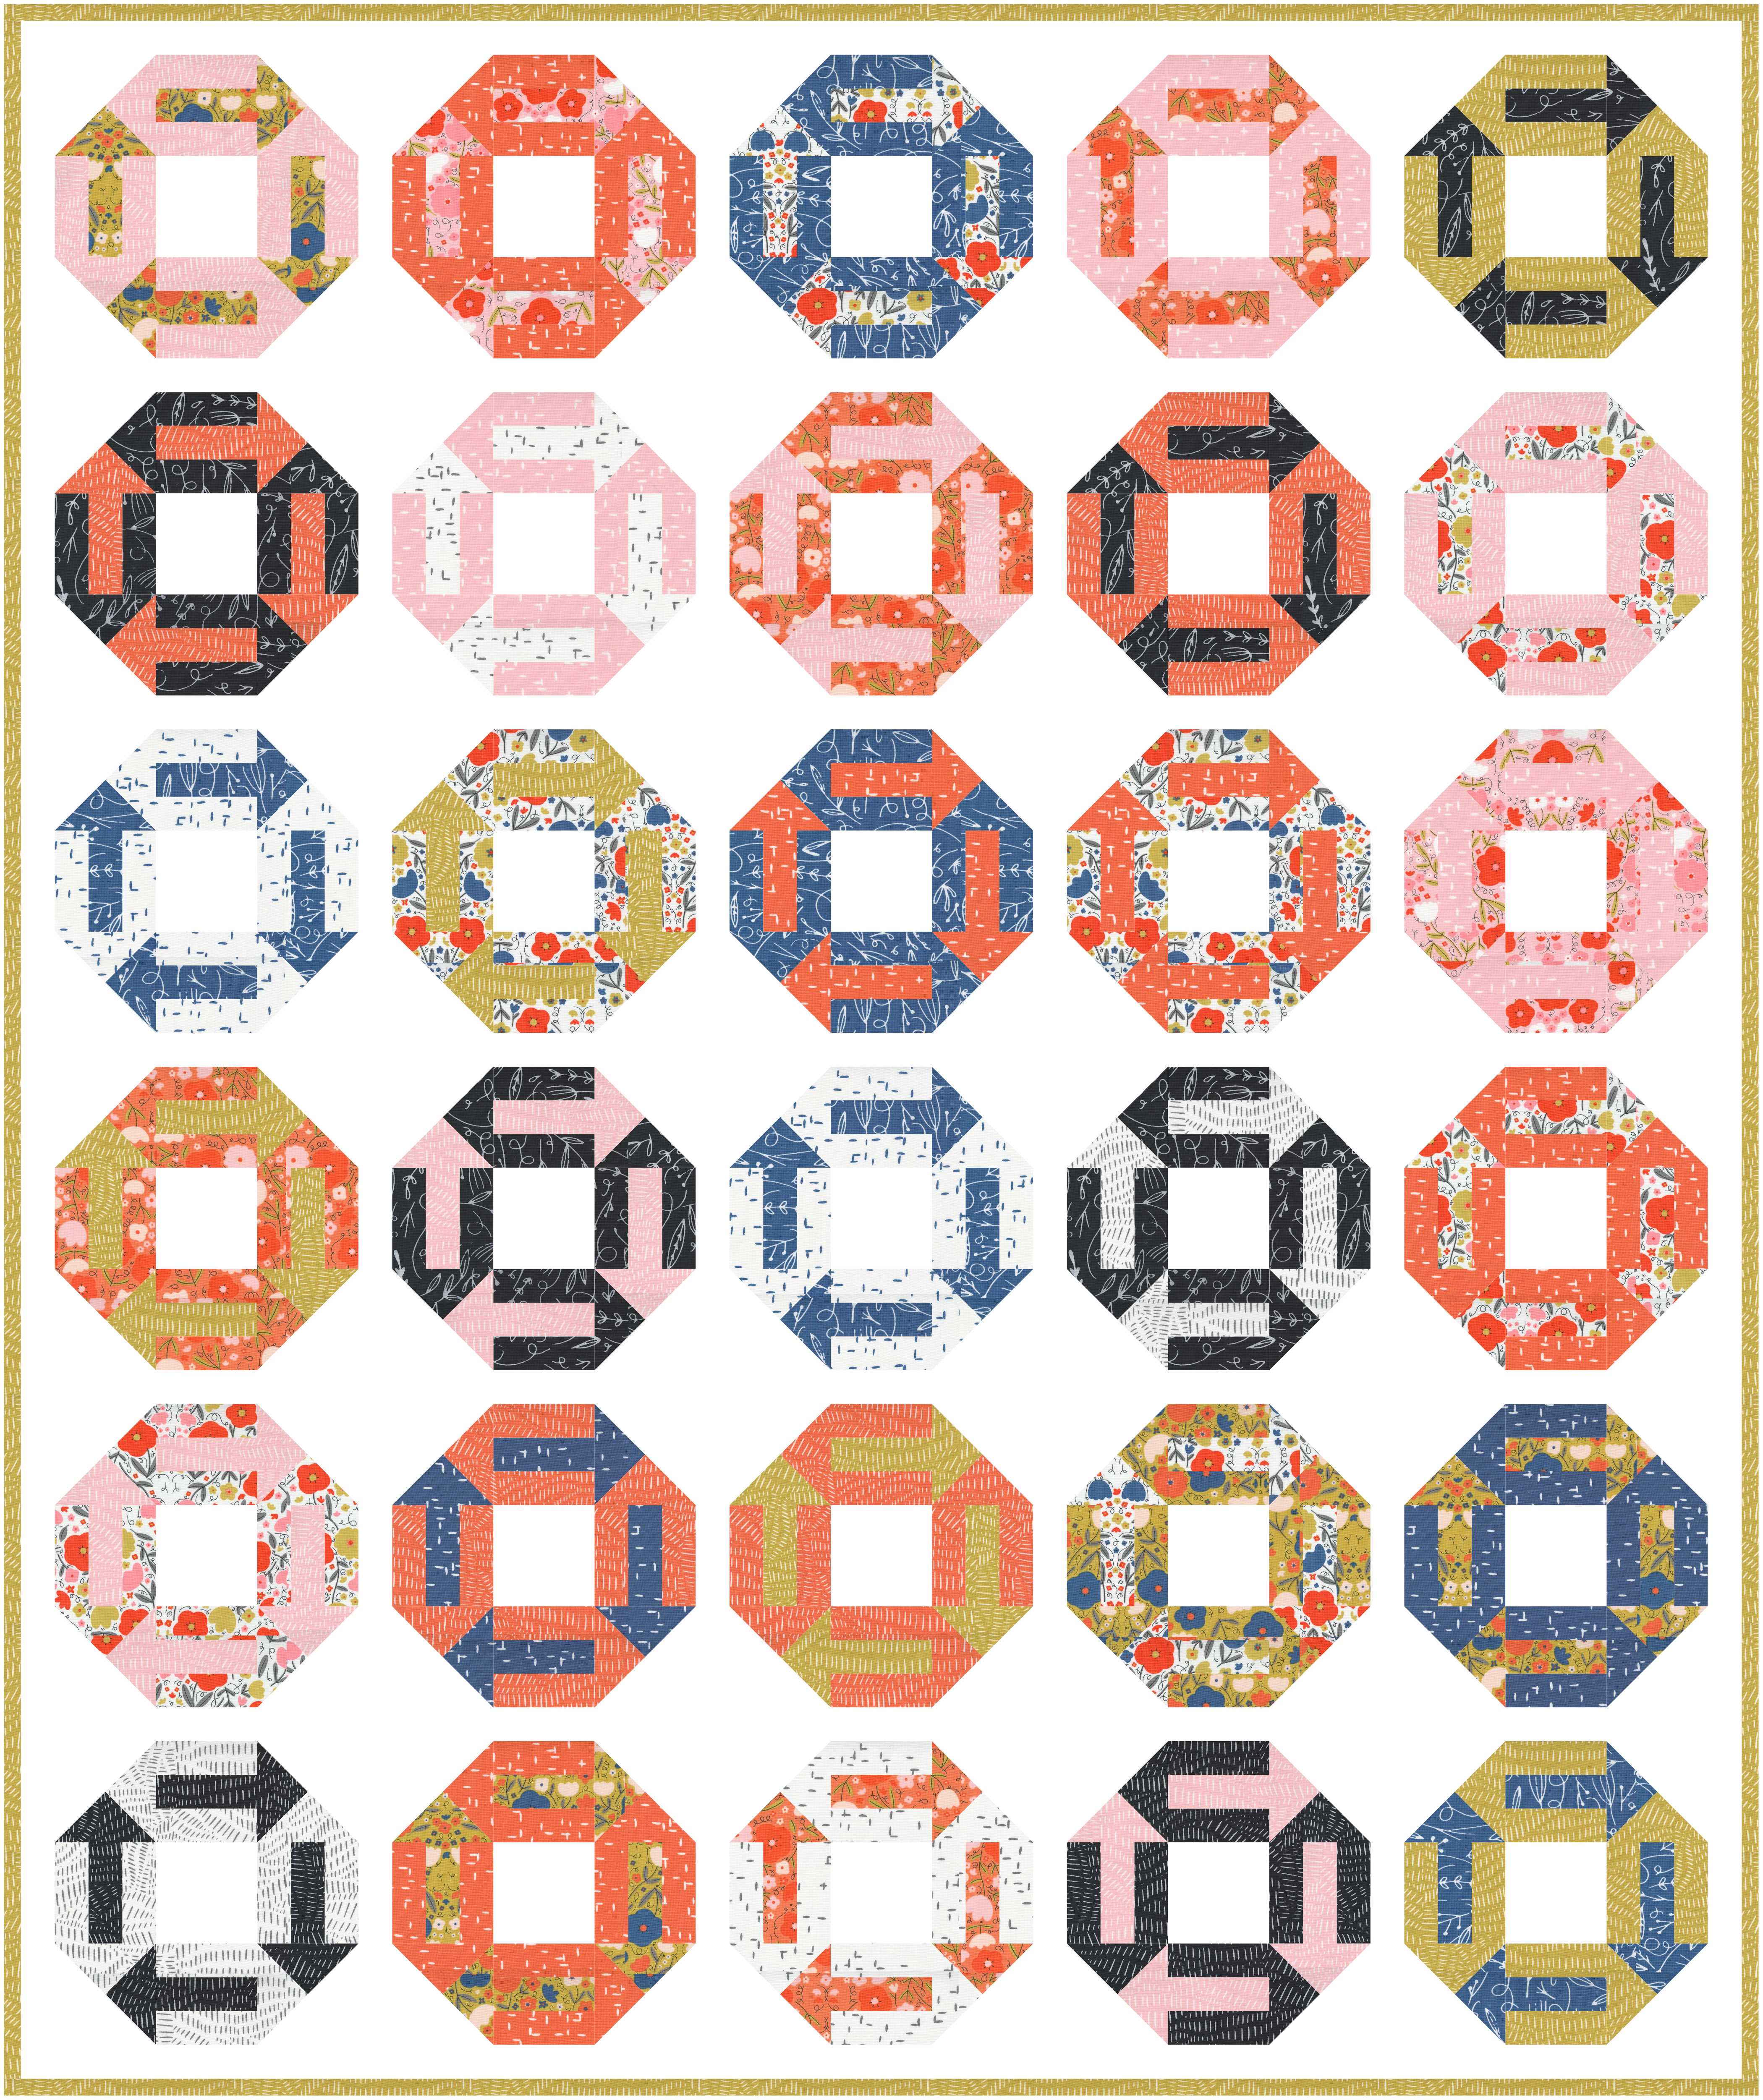
Before getting started, I want to encourage you to download the FREE Bonus Pattern featuring Block 3 of the BOM. It includes all of the yardages, cutting instructions and block assembly instructions required to make a super fun, and scrappy, throw quilt. The best part? You don’t have to participate in the Words to Live By BOM quilt-a-long to take advantage of this free project! Anyone can download the pattern and enjoy the Bonus Pattern! Shout it from the rooftops! Here is a quick reminder of what the Block 3 Bonus Project looks like.
I found fabric pull for Month 3 to be delightful! It has all of my favorite skus from the Words to Live By Collection. (The golds, the black floral print, the dusty blues and coral flowers) Perfection! I decided to take a couple photos of my favorite fabric pairings.
I could create an entire quilt using the black, gold and white prints from this collection. They work together to create a modern, sophisticated look. Pictured with these prints are a couple of my favorite tools:
• Spools of Aurifil thread, which is my to-go thread brand.
• I have also pictured my fabric shears and snips from LDH Scissors. I highly recommend this brand for the durability and sharpness.
• A fancy gold sewing machine cleaning brush from Bohin. If you’re going to clean the lint from your sewing machine, you might as well do it in style right?

The bright hand-drawn florals and dusty blues are so beautiful together. This is such a cheerful fabric pairing, and so vastly different from the gold, black and white pairing.

Included in Month 3 is the “Give More Than You Get” panel. I think this is such a beautiful message. When we encourage, uplift, or help another person, it not only feeds their soul but our own soul as well. Giving doesn’t have to mean material things. It can mean giving time, giving attention, giving love or giving empathy.
The “Give More Than You Get” panel is so beautifully drawn, and features wonderful tiny details!


I enjoy the Lemon Panel so much and appreciate the freshness that it brings to Month 3. To add a personal touch to the panel, I decided to add an applique leaf using the coordinating blue sku from Month 3 (Fabric M). I love the texture that the slightly raised leaf and the zig-zag stitching adds to the panel.
Here are the steps I took to create the applique leaf:
1. Place the panel right side down. I used a white work surface so that I could see the leaf through the wrong side of the fabric. Placing the panel right side down when tracing ensures that the leaf will be oriented correctly when it’s appliqued.
2. Place a piece of paper backed fusible web overtop the leaf on the wrong side of the panel. Do not iron at this time.
3. Trace the leaf onto the paper side of the fusible web. The traced leaf should be a mirror image of the leaf pictured on the right side of the panel.
4. Cut out the leaf just outside of the traced line, leaving room for trimming.
5. Fuse the leaf onto the wrong side of the selected fabric. Cut out the leaf on the traced line.
6. Let the leaf completely cool, then remove the paper from the glue side of the fusible web.
7. Fuse the leaf into place.
8. Secure with a zig-zag stitch!


Now, to create the blocks!
I don’t know about you, but sometimes it’s nice to piece an easy, straight forward block like Block 5. The simplicity of Block 5 combined with the bold and bright prints pack a lot of punch with very little fuss.

Sewing Block 6 was a bit more time consuming, but just as fun! I enjoyed using these tried-and-true piecing methods. You can’t go wrong with Stitch and Flip Methods and Flying Geese Assembly. I have a couple quick tips for success on Block 6:
• When sewing units together, particularly units such as flying geese units or square-in-a-square units, when possible, I place the units with the most points on the top side when sewing. See the image below for reference. Seeing the wrong side of the flying geese unit, or another unit with a point, shows you exactly where to place your needle when sewing, so that you hit the point every time. This ensures that the point is preserved.
• When assembling the horizontal block rows, I used (4) pins to help me align the center seam in units from Step 5 with the points in the square-in-a-square units from Steps 6-7. See the image below for reference. Again, sewing these horizontal rows together with the top or bottom Block 6 horizontal rows facing up, ensured that the square-in-a-square unit points were not lost.


And just like that, Month 3 is done! Month 3 is perhaps my favorite month so far. The simplicity, the fabric choices and piecing methods were a treat! I hope you enjoyed Month 3 as much as I did.
Next month, we’ll tackle loads of Stitch and Flip rectangles and a not-so-tricky Card Trick block!
Have a wonderful month, and thank you for following along.
Natalie


Find us on Instagram @gingibermakes. Share your work with the hashtags #gingiberbom and #wordstolivebyquilt so that we can follow along with your progress!
Questions? Contact us at [email protected]

Stacie Bloomfield
Author
My name is Stacie Bloomfield! I am the owner and illustrator of Gingiber. I have been an illustrator for 11 years and have successfully sold my artwork across several categories such as art licensing, wholesale, direct to customer sales, direct downloads, books, teaching, and more. I cannot wait to teach you how to do the same!

FREE GUIDE!
We've gathered top secret tips from industry experts with their PERSONAL ADVICE for finding your creative voice and for growing your creative business. YOU DON'T WANT TO MISS THIS!
Recent Posts